DIY: 5 – Minuten – Schmuckständer
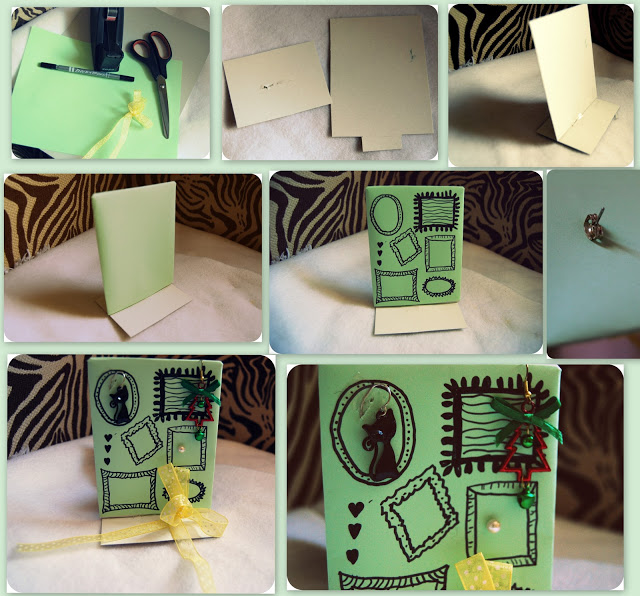
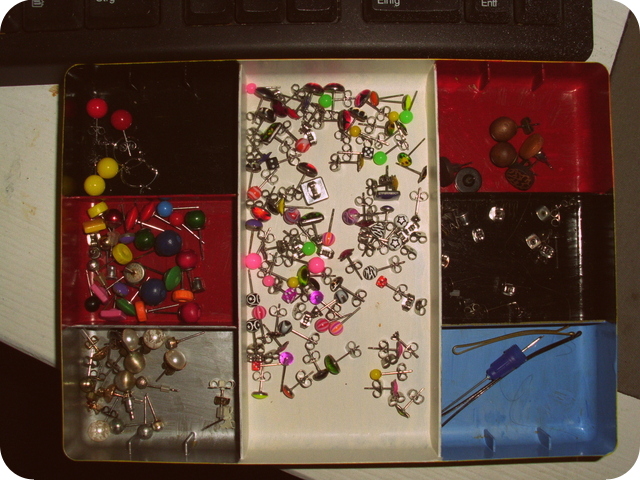
DE: Hallo ihr Lieben. Gestern erreichte mich ein Kommentar und ein Bild (s. oben) von der lieben Edda mit folgender Bitte: „Kannst du mal ein DIY machen, wo es um die Aufbewahrung der Ohrstecker geht“. Gelesen, getan. Ich muss dazu sagen, ich habe selber Ear Plugs und keine Stecker mehr. Ich habe zwar noch zwei „normale“ Ohrlöcher. Aber dafür auch nur zwei Ohrringe, die immer drin sind. Ich habe ein wenig gekramt und noch alte Ohrringe gefunden, aber nur drei Stück, deswegen entschuldigt bitte die mickrige Schmuckausbeute! Ich habe eine mini Version gebastelt. Es dauerte nur 5 Minuten und die Materialien sind meist schon vorhanden! Es ist nur ein Prototyp. Ihr könnt natürlich gerne größere Ständer machen, buntere, prunkvollere usw. Da ich ihn aber nur zu Vorführzwecken benutzen wollte für euch, sieht meiner etwas „halbherzig“ aus. Obwohl ich denke, wenn man Löcher in die Pappe schneidet, würde es auch mit Tunnel funktionieren. Lasst eure Kreativität raus! Ich fand die Idee eigentlich ganz gut, die Stecker in aufgemalte Bilderrahmen aufzubewahren! Ich denke die Bilder erklären sich selbst.
Wie bewahrt ihr eure Stecker auf? Ich habe mehrere Schalen und Döschen, immer nach Millimeter und Art geordnet. Falls ihr es nach bastelt: Ich will Ergebnisse sehen!
EN: Hello lovlies. Yesterday I’ve got a comment and a picture (pic above) by Edda, she asked me this: „Could you please make a DIY, where I can keep my ear jewelry?“ Read and done. But I have to tell you first, I’m having ear plugs, that’s why I don’t have „normal“ ear jewelry. I searched some old jewelry to show you my idea. So please apologize this. I’ve tinker this jewelry stand in only 5 minutes. Okay, it’s just a small version and quiet easy done. I think you’ll have all used material right at home. Feel free and do it however you like: bigger, more colorful and more pompous. I’ve tinker this one only to show you my idea. I keep my earplugs and tunnels in little boxes, sorted by size and material. But I guess, if you cut little wholes in it, it would also works with plugs. I think those pictures speaks for itself, how I’ve tinkled it. I like the idea to show your jewelry in little different frames, what do you think? Easy and fast done.
How do you keep your ear jewelry? I wanna see results, if you try it by yourself!


^^ j'adore!
Great idea!The result is lovely.xxx
http://tastingmoments.blogspot.com.es/
Lovely DIY! Thanks for following!
Love
Juneli from Fashionably Yours
Coool post!!
http://WWW.ROXTHEFOX.COM
very cute
http://www.melolimparfaite.com
que bonito!!!!
BESOS 😀
So cute! I hang mine on a framed screen in my room, but they often fall out when I knock into it haha! Hope you're having a wonderful day!
xo Hannah
thebraidedbandit.blogspot.com
Great DIY! 😉
Amazing post!! Really need to try it!
xoxo
Julia from aboyeur.blogspot.com
That's such a cool idea!!! I'm going to have to try this out!
xx
Sophisticated Lace
Ohh so cool, I have a bunch of ear-rings scattered around, might have to try this!
xx
http://www.shogoxo.blogspot.com
This is such a cute DIY! love it so much…so creative. 🙂
Style Without Limits
Facebook
i love the way you write!!!! 😀 i'm following you now…let's follow me back 😀 of course we can keep in touch and change our ideas 😀
fashion blog miriam stella
Die Katzenohrringe hab ich auch 🙂
amazing DIY!
xoxo!
http://www.fashionfrisson.com
coole idee, sieht super aus 🙂
wooow! great DIY & amazing idea!
lapkindressbox.blogspot.sk
Ciao!! grazie di essere passata! ti seguo!! spero ricambierai!!
wowwwwww such a lovely idea! I need to make this too, I've got lots of jewellry, love it:)))
xoxo
Melis
Love it, you are so creative hun 🙂
Aww.. That was super quick and easy! Loved it
xx
Titiyangzom.blogspot.in
ohh ! What an amazing idea ! 😉
http://www.izabielaa.blogspot.com
Great idea!!
Beautiful blog!!
kisses!!
http://miestilobasico.blogspot.com
Great and fashionable idea my dear! ;D
Kisses,
Benedetta
http://www.daddysneatness.blogspot.com
Ui fein! Da muss ich doch gleich heute Abend mal anfangen zubasteln!
Ich zeige dir dann ein Foto meines Kunstwerks!
Perfekt! 🙂
Sieht dafür aber sehr süß aus ;).
Dankeschön, uih das ist ja lieb von dir und freut mich natürlich ;).
Hihi werde ich mir merken und wenn ich das nächste Mal tagge, dann deinen Namen verwenden 😉
Hi! very cool it!
If you want we can follow each other. Just to add to my friends and I will come back to you!
lengilochka.blogspot.com
Good DIY!!
Kisses dear
So cute! Love the DIY! xx
http://rosalindatj.blogspot.com
Na für den Notfall sicherlich eine tolle Lösung! Toll gebastelt
OH wow, we gotta than Edda for asking you this then! Girl you are creative and really good at DIY o.o That's one simple yet brilliant idea! Thanks for sharing, love <3
mish
http://www.mishberries.com
really cool! def trying it out! love <3
http://www.hasehaseetlamode.blogspot.de
Das untere Modell sieht sehr süß aus, vor allem mit den aufgemalten Ramen 🙂
xx
http://www.clothesandcamera.com
very inspiring blog! i love it. Well, sure i wanna follow each other. I just followed you dear, hope you the same 🙂
ekanandapna.blogspot.com
DIE IDEE IS KLASSE ! Mir ist grad der Gedanke gekommen, wenn bald wieder ne Freundin von mir Geburtstage hat, möchte ich den wohl nachbasteln und als " überdimensionale " Karte einsetzen. Könnte mir vorstellen das Ding mit einem persönlichem Spruch zu versehen und mehrere 'schmuckige' Geschenke zu integrieren. Wenn ich was verschenke, dann meist viele kleine Dinge, weil ich selber mal so ein Geschenk aus vielen kleinen Teilen bekommen hab, und mich dann jedes Mal beim Benutzen/Sehen von so einem Teil erneut gefreut, weil ich an die Freundin dachte 🙂